Family faces are magic mirrors. Looking at people who belong to us, we see the past, present, and future. ~Gail Lumet Buckley
 To help my son transition into his "big boy" bed, I put pictures up next to his bed. I wanted to make it safe, durable and long lasting.
 You could use stickers, art projects, flash card and anything your heart desires.

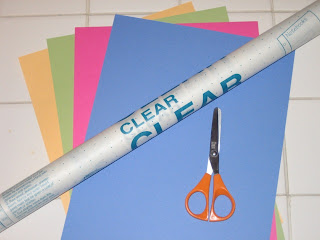
You'll need the following material:
- Roll of clear contact paper
- Scissors
- Colored card stock
- Clear packing tape*
- Your choice of decoration*
- Mono adhesive*
*Not shown in picture.First step is to plan out your project; color coordinate your pictures (I printed pictures out on regular printer paper) with your card stock, where you want it to go on the wall, how big or small you will want to print out your pictures, how you'll want to arrange them.
 Take mono adhesive and attach picture to card stock. You won't need much.
Layout your design and measure out how much clear contact paper you'll need. The contact paper has a tape measure on it. You'll want to be sure to leave enough around edges to stick to the wall.
Cut as much as you'll need. Pick up and lay photos to the side. Lay contact paper down stick side up. Carefully peel backing off. Take care to touch sticky side as little as possible. It is tricky but once laid out it should be lying flat on your work surface.
Place your photo's face down on to the contact paper lightly (in case you need to rearrange). Once in place smooth back side of card stalk.
Using packing tape stick a few loops on to the back of the card stock to help keep pictures on wall. Take project to destination. Starting with the middle of your project, carefully smooth on to wall.
Put a strip of packing tape on all sides of contact paper. Keeps little fingers from peeling off contact paper.Last, take a step back and watch the children enjoy the family wall!


